


introduction
Vulnerability scanning is a kind of security detection behavior, and it is an important network security technology. It can effectively improve network security, and vulnerability scanning is an active preventive measure, which can well avoid hacker attacks and prevent disasters. Before it happens. So what are the easy-to-use vulnerability scanning tools?
The answer is in this article!
5 tools, pack and take away!
overview
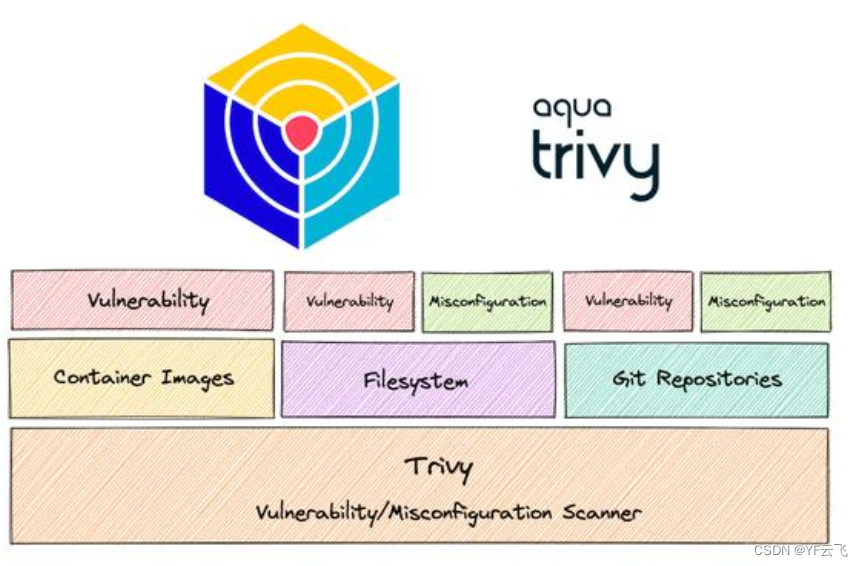
Trivy is an open source vulnerability scanner capable of detecting CVEs in open source software. The tool provides a timely explanation of the risks, allowing developers to decide whether to use the component in a container or application. While conventional container security protocols use static image scanning to discover vulnerabilities, Trivy seamlessly incorporates vulnerability scanning tools into the integrated development environment.
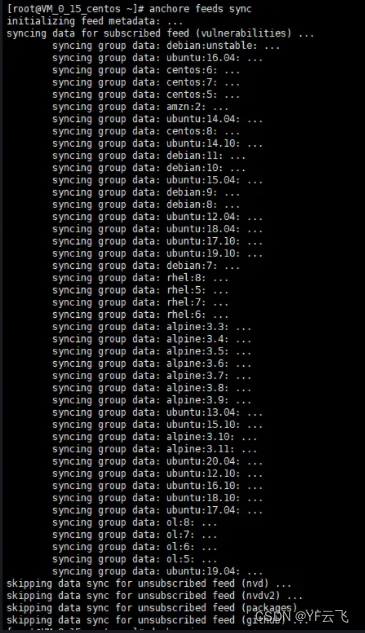
In addition, because of the huge open source community, many integrations and add-ons support Trivy. For example, Trivy can be installed on a Kubernetes cluster using the Helm chart, and vulnerability indicators can be extracted with the help of the Prometheus exporter.
Install
Trivy installation:
It’s very simple. If you have a Golang environment, you can compile and build it yourself in the Clone source code warehouse. Or install using your distribution’s package installer, such as CentOS:
sudo apt-get install wget apt-transport-https gnupg lsb-release
wget -qO – aquasecurity.github.io/trivy-repo/deb/public.key | sudo apt-key add –
echo deb aquasecurity.github.io/trivy-repo/deb $(lsb_release -sc) main | sudo tee -a /etc/apt/sources.list.d/trivy.list
sudo apt-get update
sudo apt-get install trivy
Ubuntu installation:
sudo apt-get install wget apt-transport-https gnupg lsb-release
wget -qO – aquasecurity.github.io/trivy-repo/deb/public.key | sudo apt-key add –
echo deb aquasecurity.github.io/trivy-repo/deb $(lsb_release -sc) main | sudo tee -a /etc/apt/sources.list.d/trivy.list
sudo apt-get update
sudo apt-get install trivy
Trivy also supports container deployment:
docker pull aquasec/trivy:0.20.2
Then start the container directly:
docker run –rm -v [YOUR_CACHE_DIR]:/root/.cache/aquasec/trivy:0.20.2 [YOUR_IMAGE_NAME]
If you want to scan the image on the host, you may need to mount docker.sock, for example:
docker run –rm -v /var/run/docker.sock:/var/run/docker.sock \
-v $HOME/Library/Caches:/root/.cache/aquasec/trivy:0.20.2 python:3.4-alpine
The second model: OpenVAS
overview
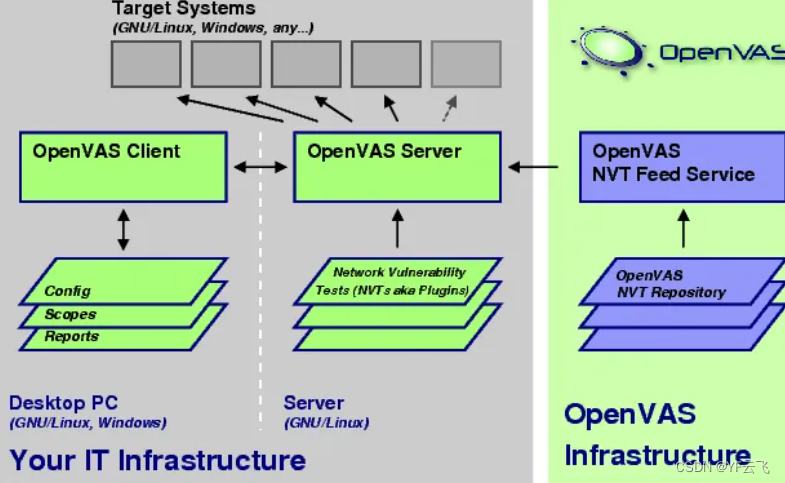
OpenVAS is a full-featured free and open source vulnerability scanner and management system. It is licensed under the GNU General Public License and supports different operating systems including several Linux distributions. OpenVAS utilizes an automatically-updable community-sourced vulnerability database covering more than 50,000 known network vulnerability tests. That is, it provides a very fine-grained look at the entire system and tests against authenticated or unauthenticated protocols. The implemented vulnerability test is also quite detailed, and will deeply analyze the degree of protection of computers and servers.
Install
1. Preconditions
①. The virtual machine is configured with static ip, bridge mode, and IPADDR is set, among which GATEWAY, NETMASK, and DNS need to be set to be consistent with the right-click network-change adapter-Ethernet status-details
②. Set the virtual machine agent, set the agent for the virtual machine through the graphical interface, you can access the network, but you cannot use the yum source. To install openvas, you need to use the yum source and make the following modifications. Add the following lines to /etc/yum.conf
proxy=http://10.4.200.228:8080
proxy_username=bmcc\60000
proxy_password=pl,12345
③ Add in ./root/.bashrc (/etc/profile) (or enter it on the command line, it is temporary in the terminal):
export http_proxy=”http://username:[email protected]:808″
④. If it is authenticated by ip or network card, all user, password, etc. can be ignored. When you stop using the proxy, you need to restore the environment variable and yum configuration file: unset http_proxy (remove the environment variable), enter env to view the environment variable
2. Configuration steps
①. Disable selinux, restart to take effect
(#SELINUX=enforcing,
#SELINUXTYPE=targeted)
yum online installation
[root@localhost ~]#vi /etc/selinux/config
SELINUX=disabled
[root@localhost ~]#reboot
②. Close the firewall
systemctl stop firewalld
③.yum update
yum update -y
④. Installation dependencies:
yum install -y wget bzip2 texlive net-tools alien gnutls-utils
⑤.Add warehouse
wget -q -O – http://www.atomicorp.com/installer/atomic | sh
⑥. Install openvas
yum install openvas -y
The third style: Clair
overview
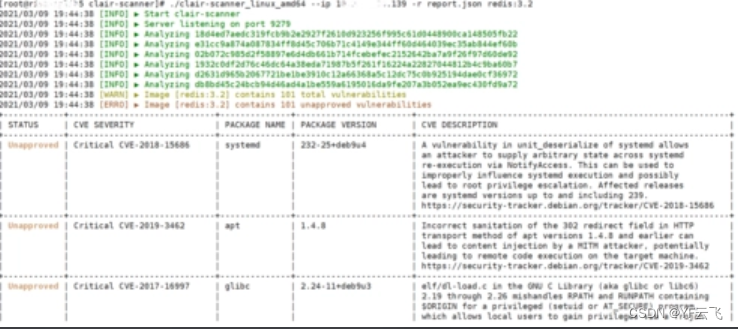
Clair is an API-based vulnerability scanner that can detect any known security vulnerabilities in the open source container layer, making it easier to create services that continuously monitor containers and find security vulnerabilities. Clair regularly collects vulnerability metadata from various sources, indexes container images, and provides an API for retrieving the signatures found by images. Once the vulnerability metadata is updated, the user will be notified, so that new vulnerabilities can be discovered in time from the previously scanned images. In addition, Clair provides an API that can be used to query specific container image vulnerabilities.
Install
1. Install the Clair environment on OpenShift
create project
Create a clairv4-postgres.yaml file with the following content:
Execute the command to create an object according to clairv4-postgres.yaml
Create a config.yaml file with the following content:
Execute the command to create a secret according to the config.yaml file
Create a clair-combo.yaml file with the following content:
Execute the command to create an object according to the clair-combo.yaml file
View deployed resources
The detailed steps are as follows:
1.
$ oc new-project quay-enterprise
2.
—
apiVersion: apps/v1
kind: Deployment
metadata:
name: clairv4-postgres
namespace: quay-enterprise
labels:
quay-component: clairv4-postgres
spec:
replicas: 1
selector:
matchLabels:
quay-component: clairv4-postgres
template:
metadata:
labels:
quay-component: clairv4-postgres
spec:
volumes:
– name: postgres-data
persistentVolumeClaim:
claimName: clairv4-postgres
containers:
– name: postgres
image: postgres:11.5
imagePullPolicy: “IfNotPresent”
resources:
limits:
cpu: ‘2’
memory: 6Gi
requests:
cpu: ‘1’
memory: 4Gi
ports:
– containerPort: 5432
env:
– name: POSTGRES_USER
value: “postgres”
– name: POSTGRES_DB
value: “clair”
– name: POSTGRES_PASSWORD
value: “postgres”
– name: PGDATA
value: “/etc/postgres/data”
volumeMounts:
– name: postgres-data
mountPath: “/etc/postgres”
—
apiVersion: v1
kind: PersistentVolumeClaim
metadata:
name: clairv4-postgres
labels:
quay-component: clairv4-postgres
spec:
accessModes:
– “ReadWriteOnce”
resources:
requests:
storage: “10Gi”
volumeName: “clairv4-postgres”
3.
$ oc create -f clairv4-postgres.yaml
$ oc expose deployment/clairv4-postgres
4.
introspection_addr: :8089
http_listen_addr: :8080
log_level: debug
indexer:
connstring: host=clairv4-postgres port=5432 dbname=clair user=postgres password=postgres sslmode=disable
scanlock_retry: 10
layer_scan_concurrency: 5
migrations: true
matcher:
connstring: host=clairv4-postgres port=5432 dbname=clair user=postgres password=postgres sslmode=disable
max_conn_pool: 100
run: “”
migrations: true
indexer_addr: clair-indexer
notifier:
connstring: host=clairv4-postgres port=5432 dbname=clair user=postgres password=postgres sslmode=disable
delivery: 1m
poll_interval: 5m
migrations: true
5.
$ oc create secret generic clairv4-config-secret –from-file=./config.yaml
6.
7.
$ oc apply -f clair-combo.yaml
$ oc expose svc/clairv4
8.
$ oc get all
NAME READY STATUS RESTARTS AGE
pod/clair-combo-6754dcfd75-wwbt9 1/1 Running 0 34s
pod/clairv4-postgres-b9f679dc6-fhmcs 1/1 Running 0 2m51s
NAME TYPE CLUSTER-IP EXTERNAL-IP PORT(S) AGE
service/clairv4 ClusterIP 10.217.4.159 <none> 80/TCP,8089/TCP 34s
service/clairv4-postgres ClusterIP 10.217.5.64 <none> 5432/TCP 119s
NAME READY UP-TO-DATE AVAILABLE AGE
deployment.apps/clair-combo 1/1 1 1 34s
deployment.apps/clairv4-postgres 1/1 1 1 2m51s
NAME DESIRED CURRENT READY AGE
replicaset.apps/clair-combo-6754dcfd75 1 1 1 34s
replicaset.apps/clairv4-postgres-b9f679dc6 1 1 1 2m51s
NAME HOST/PORT PATH SERVICES PORT TERMINATION WILDCARD
route.route.openshift.io/clairv4 clairv4-quay-enterprise.crc-dzk9v-master-0.crc.fa7bdknrdb3y.instruqt.io clairv4 clair-http None
https://github.com/quay/clair/releases
$ curl -L https://github.com/quay/clair/releases/download/v4.3.5/clairctl-linux-amd64 -o ~/clairctl
$ chmod +x clairctl
$ PATH=$PATH:~/
Fourth:Anchore
overview
Anchore is an open source Docker container policy compliance and static analysis tool. Once activated, Anchore automatically performs image scanning, analysis, and assessment of container content. The final result will be a policy evaluation for each image to determine whether it meets business requirements. Anchore mainly discovers hidden vulnerabilities by analyzing the contents of container images. At the same time, it scans for known vulnerabilities and ensures that images follow best security standards and best industry practices. Most importantly, Anchore integrates with container registries and CI/CD tools.
Install
https://github.com/anchore/anchore.git
anchor architecture
In the past, setting up Anchore required specifically installing the Anchore Engine, which runs independently of your image build environment. A separate CLI lets you interact with the engine.
This model requires a series of CLI commands to register an image with Anchore, start a scan, and access the results. These steps advance anchoring by extracting images from the registry, generating reports, and making them ready for use.
Anchore now also provides inline scanning. These give you a command to scan the image and get the result in the terminal. We will focus on this feature in this article.
run inline script
Inline scanning is provided by a Bash script hosted on the Anchore server. Download the script to your machine and make it executable:
curl -s https://ci-tools.anchore.io/inline_scan-latest -o anchore.sh chmod +x anchore.sh
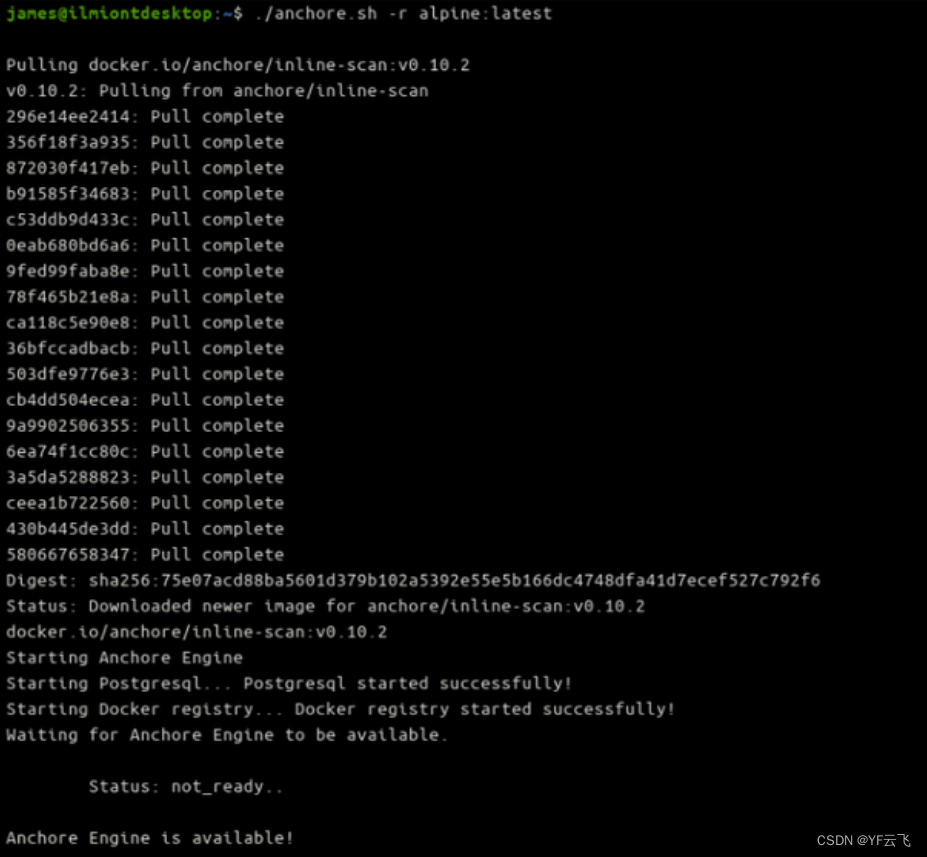
Now you can start scanning container images using an inline script:
./anchore.sh -r alpine:latest
The first scan may take a while. The script will pull the Anchore Engine Docker image, start a new Anchore instance, and configure PostgreSQL and a Docker registry instance. It then waits for the anchor engine to start.
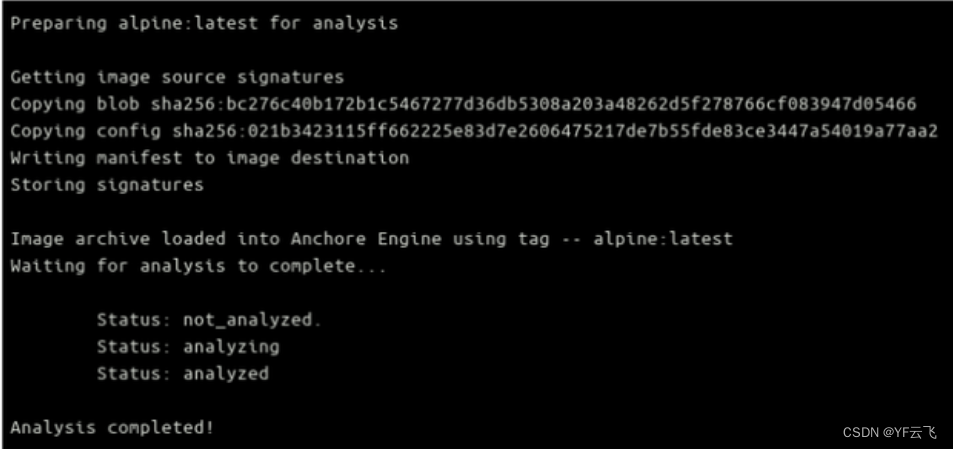
Once the engine is running, the target Docker image will be pulled and analyzed. You will then see the security report displayed in the terminal. The script will finish by cleaning up the environment and stopping the Anchore Engine Docker container.
Fifth paragraph: Sqlmap
overview
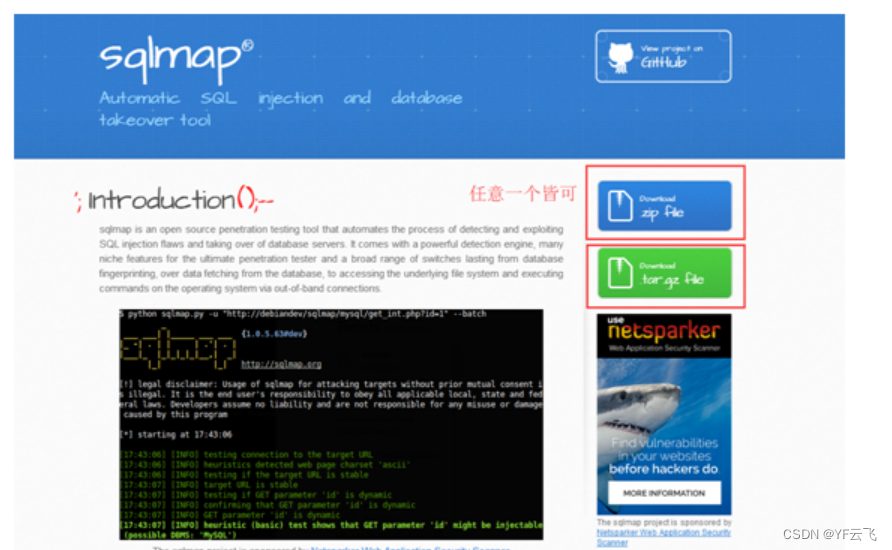
Sqlmap is a penetration testing tool, but it has the function of automatically detecting and evaluating vulnerabilities. The tool goes beyond simply finding security vulnerabilities and exploits, it creates detailed reports of the findings. Sqlmap is developed using Python and supports any operating system with a Python interpreter installed. It automatically identifies password hashes and uses six different methods to exploit SQL injection vulnerabilities. In addition, Sqlmap’s database is very comprehensive, supporting oracle, PostgreSQL, MySQL, SqlServer and access.
Install
1. Environmental requirements
Python2.7 (python3 not supported)
2. Installation steps
Download the latest version of the sqlmap installation package from the sqlmap official website http://sqlmap.org/. The current display version is 1.3.2-25, as shown in the figure below:
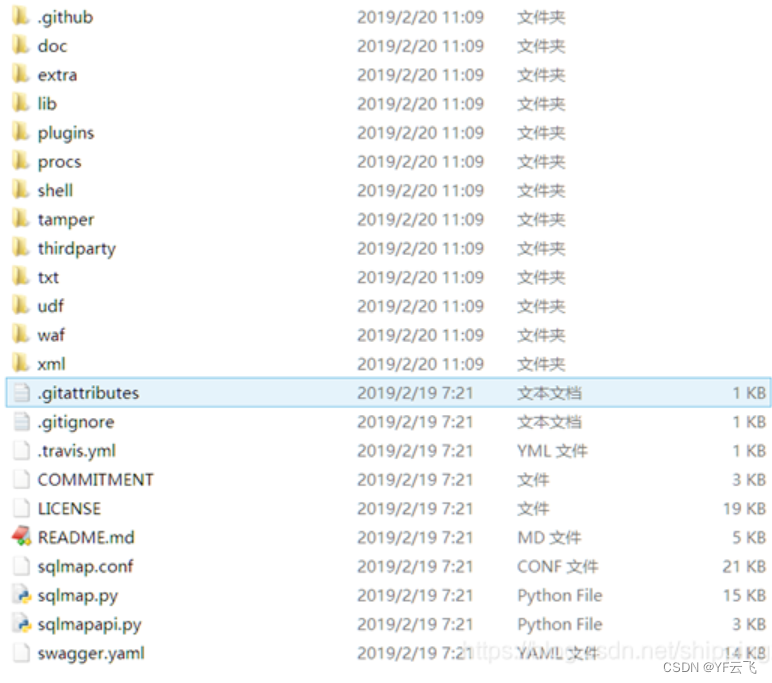
Unzip the downloaded installation package sqlmapproject-sqlmap-1.3.2-25-gaf890d6.zip to the directory you want to store and rename it. Here we take the D drive as an example, and rename the decompressed file to sqlmap. The directory structure after decompression is shown in the figure below:
To verify whether the installation of sqlmap is complete, you can perform the following operations to verify:
1. Open the cmd window and enter the python installation directory (if the python environment variable is configured here, you do not need to enter this directory):
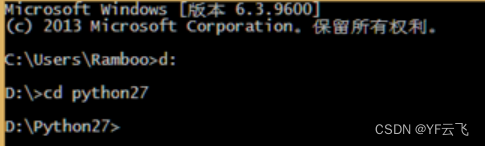
2. Execute the following command:
python D:\sqlmap\sqlmap.py –version
3. If the sqlmap version number is displayed, the installation is successful. As shown below:

